Inhaltsverzeichnis
Graphics / print templates
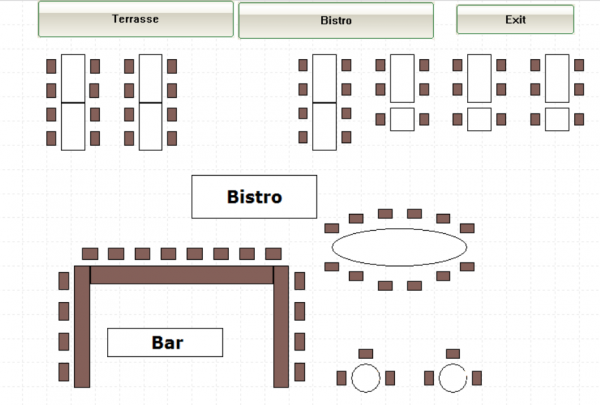
You can use the graphics editor to create letterheads, use them as a background for invoices or for a letter. You can design your own green fee bag tags, and a table plan is also possible for the catering trade. Ask us: support@pccaddie.com
Open the graphic editor
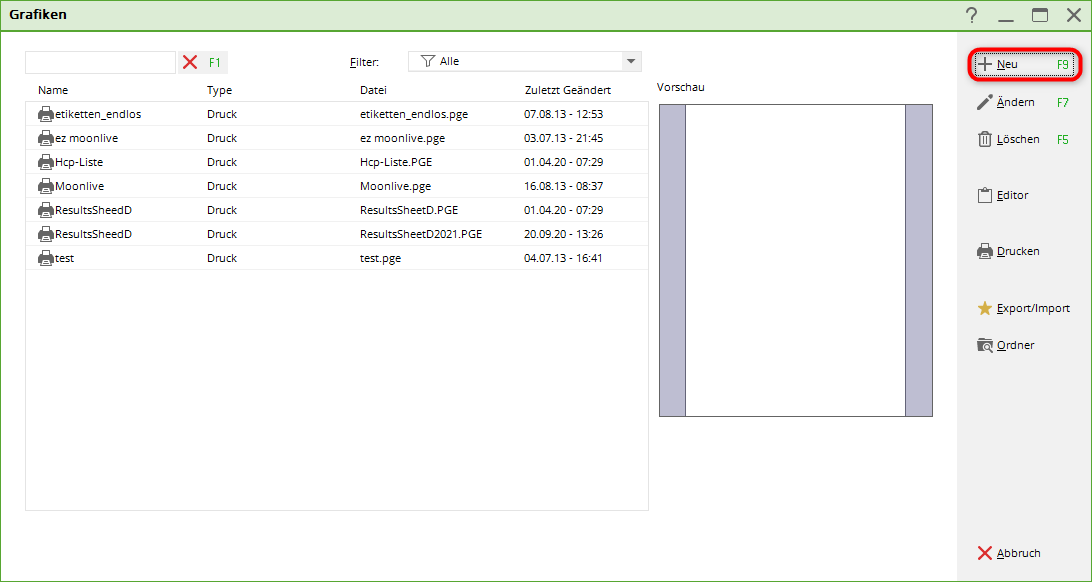
With the macro g macro takes you to the graphics editor from where you can edit graphics.
Here you will see all graphics that are in the PC CADDIE main folder GRAPHICS as well as those that may also be in the main folder DATA folder.
Letterhead
Intended use
You can use a letterhead for printing invoices, for example. The invoice is then printed directly with the letterhead
printed out. This is important if you want to use the module Invoice by email module to send invoices as a PDF attached to an email.
You can also print the AHR info letters directly with the letterhead, for example.
Logo info
The ideal logo size for letterhead printing is 150 pixels per inch in BMP format. This corresponds to a file size of approx. 220 KB for a 4×4 cm image. BMP defines the colours correctly from the start, with a JPG format it is possible that the colours are changed depending on whether it has been saved in 3-colour or 4-colour mode.
Creating the letterhead
If you know how your letterhead should look in detail and have the logo available as a file, you can start.
Name the new graphic
Open the graphics editor via Settings-macro with the macro g and OK.
Then click on the right on New…
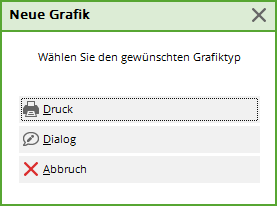
…and continue with print
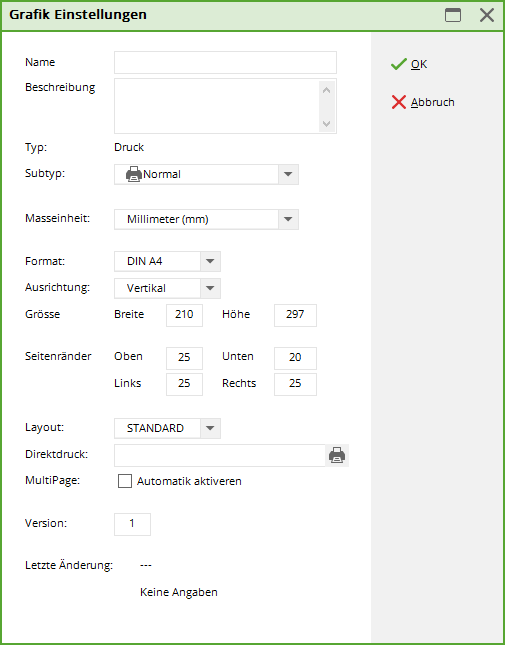
This opens the editor for a new graphic and also the „Graphic settings“ window, where you can enter the name of the letterhead, e.g: Letterhead example golf club
The format should be A4 for a letterhead. If you now set the margins everywhere to 0 you will then have clear grids (squares) across the entire A4 page.
Then confirm the graphic settings with OK
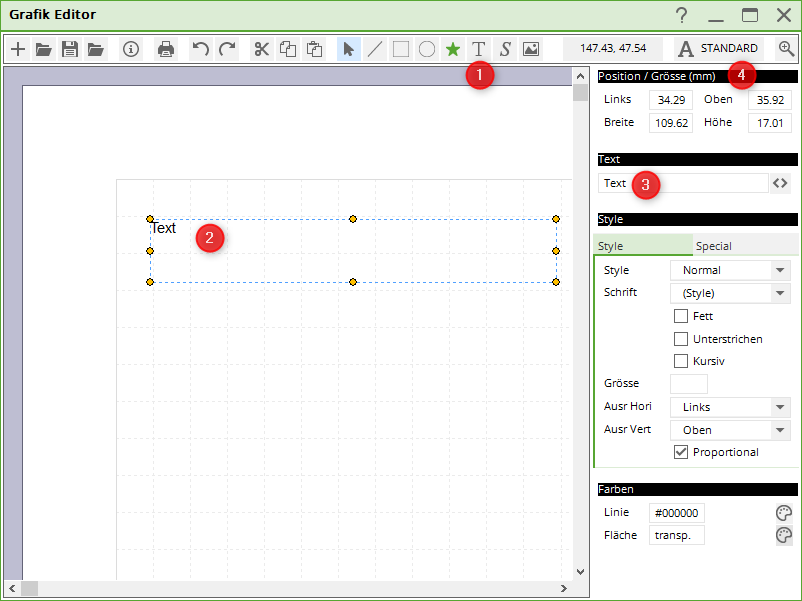
Texts

- Click on A activates text fields
- Drag the desired position with your mouse
- Write the line of text, e.g. the sender, in the text field.
- You can change the position as required
Dot between texts
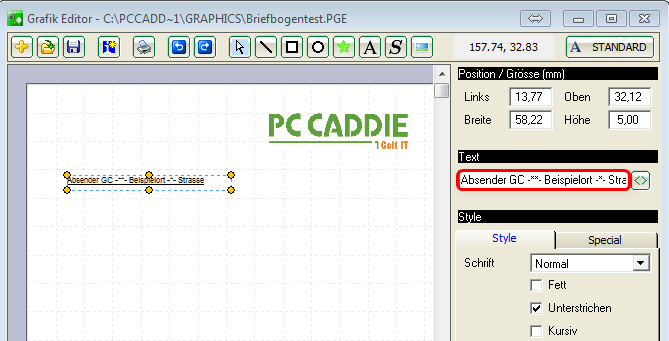
If you want a dot to be printed between the name, city and street for your sender, for example, do this as follows:
Instead of a dot, enter 1x a minus sign, 2 asterisks and 1x a minus sign again in the text to create the bold point.
If you enter 1x the minus sign, 1x the asterisk and 1x again a minus sign instead of a full stop, a small dot is created.
The result when printing looks like this, depending on the font. The 1st point is bold, the 2nd point is „normal“ as an example:
Logos and images
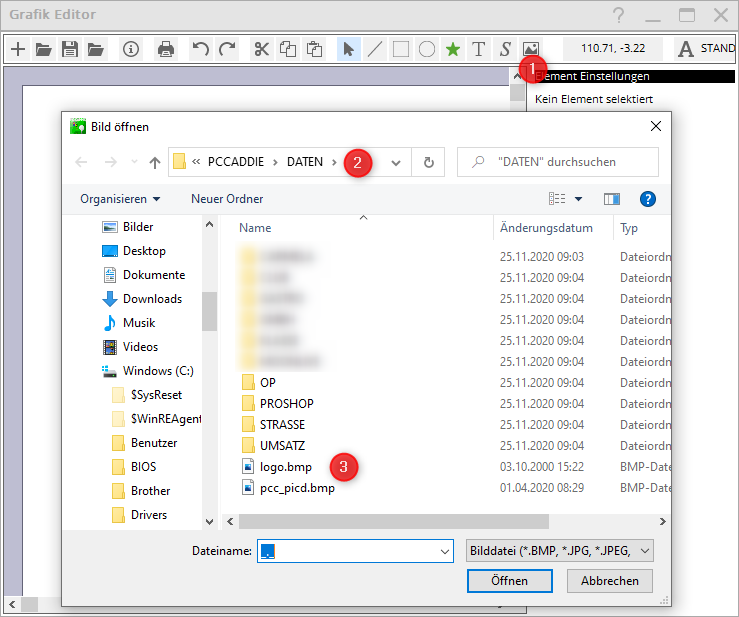
- Click on the picture-symbol.
- PC CADDIE automatically opens the main folder DATA.
- You can easily select the desired logo. Logos should always be saved (as bmp) in this folder if you use them in PC CADDIE.
- Adjust the position. If the size of the logo does not fit, only change the width here. width.
- The image path is under 2 is set. If you are in the PC CADDIE main folder data folder, the logos will still be there when you copy PC CADDIE or retrieve it from a backup.
Lines
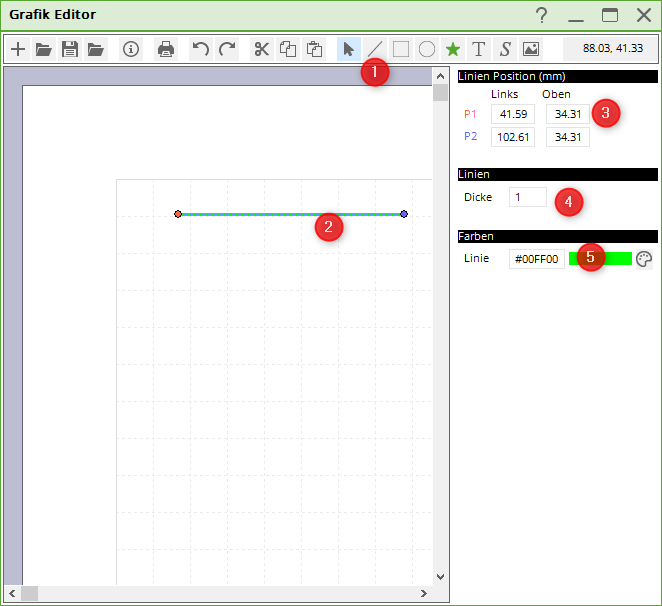
- Click on the symbol for line
- Position the line with your mouse
- You can adjust the position here
- Change the line thickness here
- Select a different colour for the line here
Save letterhead
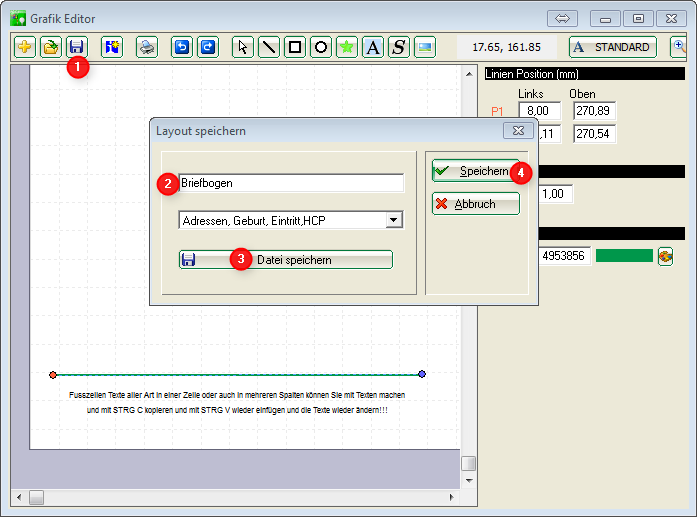
- As soon as you click on the symbol for Save button.
- .. this window opens and you can enter the name of the letterhead.
You must then click on Save file. The PC CADDIE main folder opens automatically GRAPHICSwhere you should save the letterhead with a suitable name!
- You only need point 4 if, for example, you want to save a greenfee bag tag with the layouts (which we will explain later)
Letterhead in the invoice layout
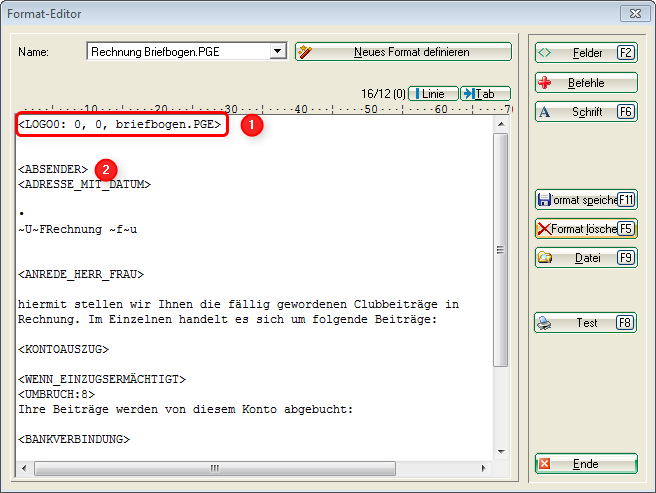
Customise your invoice layout as follows:
- This command ensures that the letterhead is also printed when the 1st page is printed! If an invoice has several pages, no letterhead is used on the following pages (but continues printing on a blank sheet). Make sure that the file name corresponds to the name with which you previously saved the graphic in the GRAPHICS folder!
- Customise other commands. In this screenshot, for example, the command <ABSENDER> should be removed, as this text for the sender is already in the graphics file!
Page 2 of the letterhead
If you also want to store a PGE file (graphic) for the 2nd page (and subsequent pages), e.g. without printing the sender line on the 2nd page, please copy your letterhead.pge, rename it, e.g. Letterhead_page2.pge, and change the graphic by deleting the text line for the sender. You can also remove the footer for the 2nd page and just print the logo or create whatever you need.
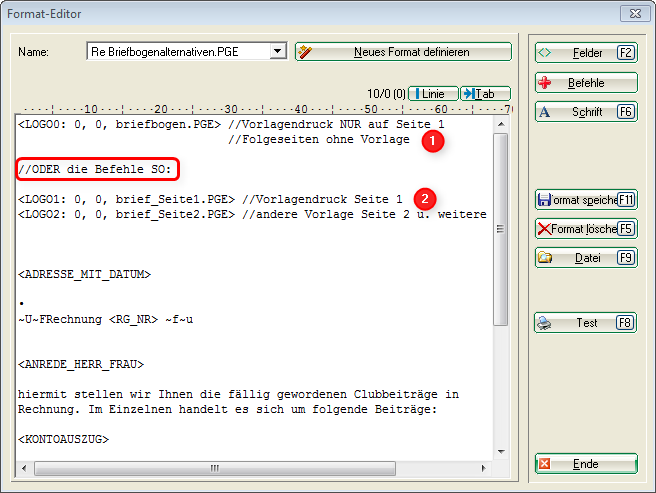
The following screenshot shows the commands alternatively are shown. If you only need a template on the 1st page
page, just use the command: <LOGO0: 0, 0, briefbogen.PGE>
If you need different templates for page 2 and the following page, use these both commands:
<LOGO1: 0, 0, brief_Seite1.PGE>
<LOGO2: 0, 0, brief_Seite2.PGE>

Font
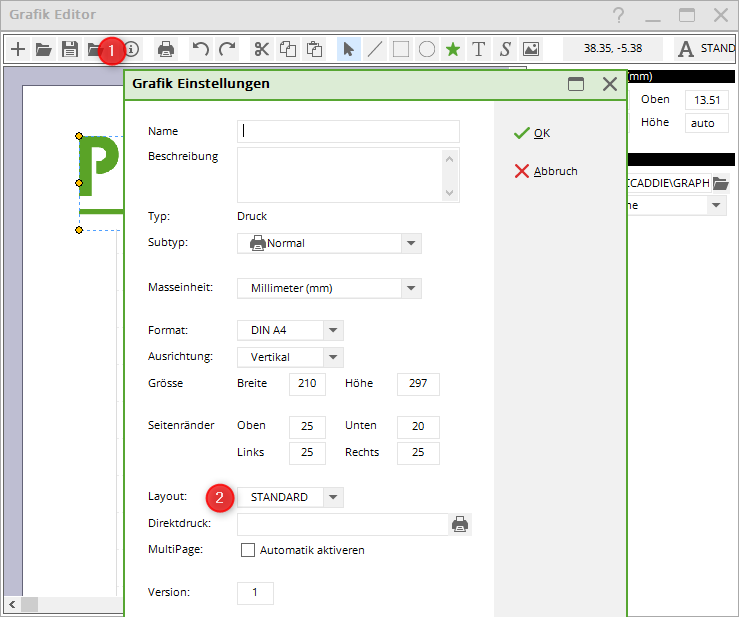
The same font is used for printing that you have generally set for printing. Look in PC CADDIE under Printer settings in the layouts. STANDARD is usually set here, but you can also name other layouts here.
- This symbol opens the selection
- You can then set the layout with the font here.
Setting different fonts
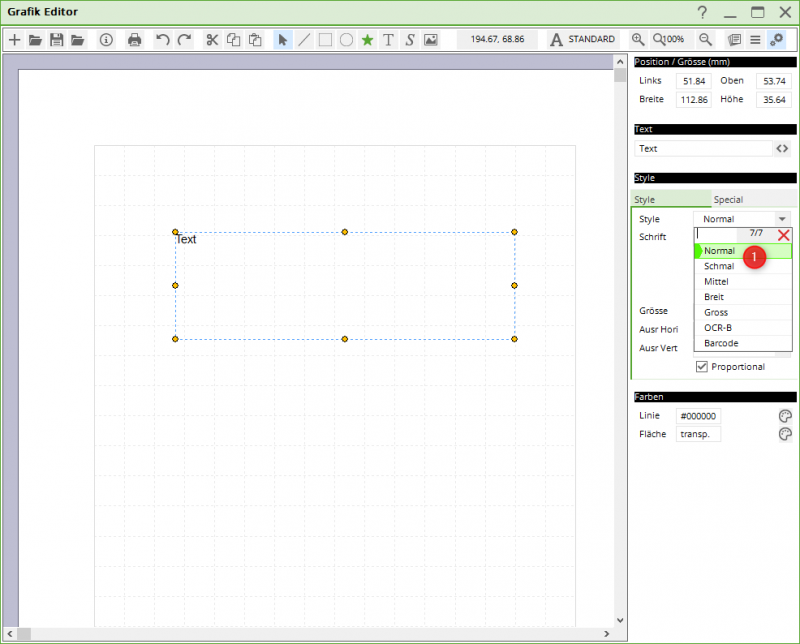
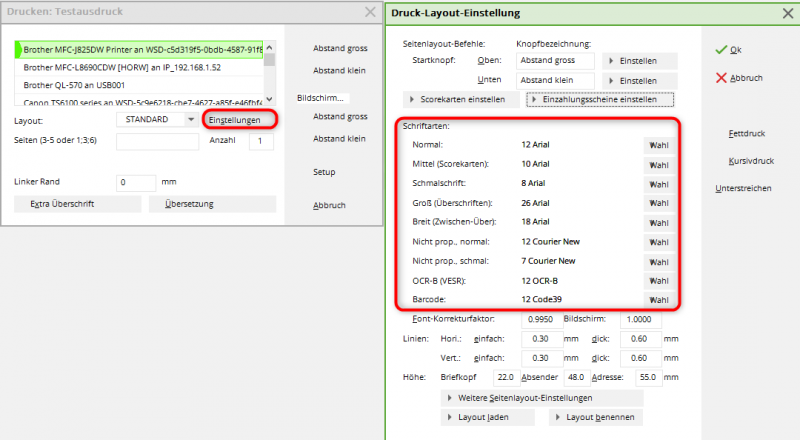
Set one of the font types (1) in the graphics editor. You can enter this individually for each text field. Different text parts are thus printed in e.g. large font and others in normal, narrow, medium or wide font. You define this via the print layout.
In the print layout, you will find the fonts via the print window and settings. You can use the „Select“ button to change the respective fonts and configure them according to your requirements.
You can see how to create a new layout HERE.
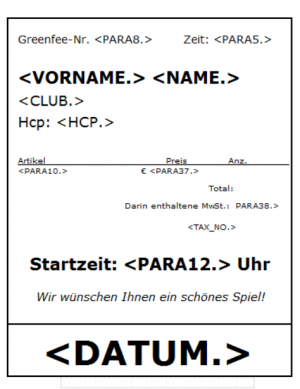
Example for bag tag with graphic editor
Example of table plans
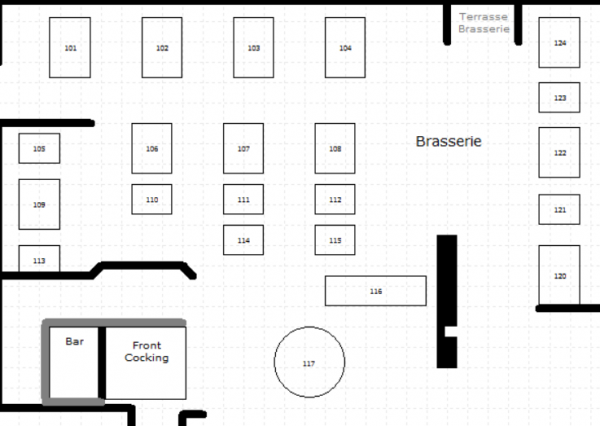
We would be happy to create a table plan according to your wishes. Please contact our support team. Per hour 145.00 CHF/96 Euro. Estimated time required: approx. 60 to 120 minutes. If more than the scheduled time is necessary, we will discuss this with you beforehand. Billing is per 10-minute work unit or part thereof.
Table plan 1
Table plan 2
Table plan 3
Example caddie box plan
We would be happy to create a caddie box plan according to your wishes. You can find examples under Cupboards and caddie boxes Please contact our support team. 145.00 CHF/96 Euro per hour. Estimated time required: approx. 60 to 120 minutes. If more than the scheduled time is necessary, we will discuss this with you beforehand. Billing is per commenced work unit of 10 minutes.
- Keine Schlagworte vergeben

